The Reports feature in SiteSkite allows you to generate professional website maintenance reports for your clients or internal teams. These reports summarize important activities such as updates, backups, uptime monitoring, performance metrics, and other maintenance tasks performed on WordPress sites.
Reports help agencies and developers demonstrate the work performed on managed websites and keep stakeholders informed with clear, automated reporting.
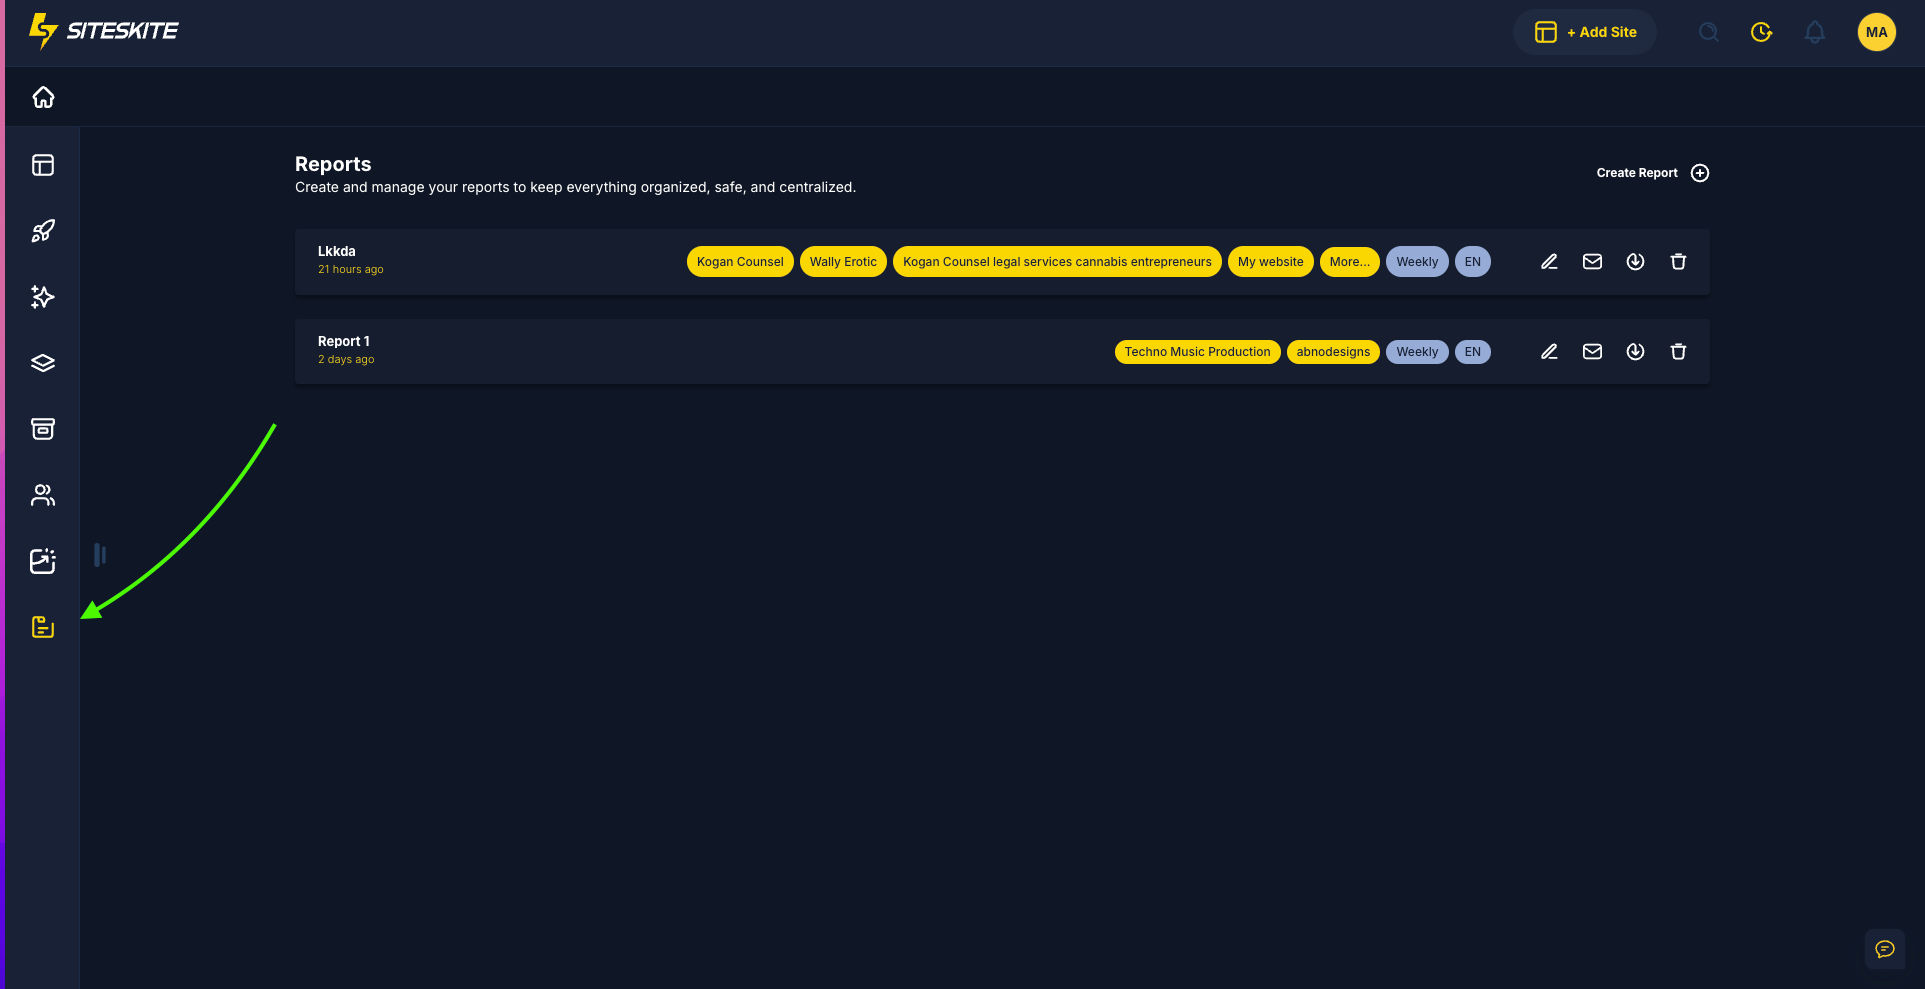
Where to Access Reports
To access the reporting system:
Open the SiteSkite Portal
Click the Reports icon in the left sidebar
You will see a list of existing Report Profiles
Click Create Report to create a new reporting setup
Each report profile can be reused for multiple websites and scheduled automatically.
Understanding Report Profiles
A Report Profile is a configuration that defines:
Report layout
Email message content
Report sections
Target websites
Recipients
Delivery schedule
Once created, SiteSkite can automatically generate reports based on these settings.
Creating a Report in SiteSkite
Creating a report involves several simple steps. The system guides you through a setup wizard.
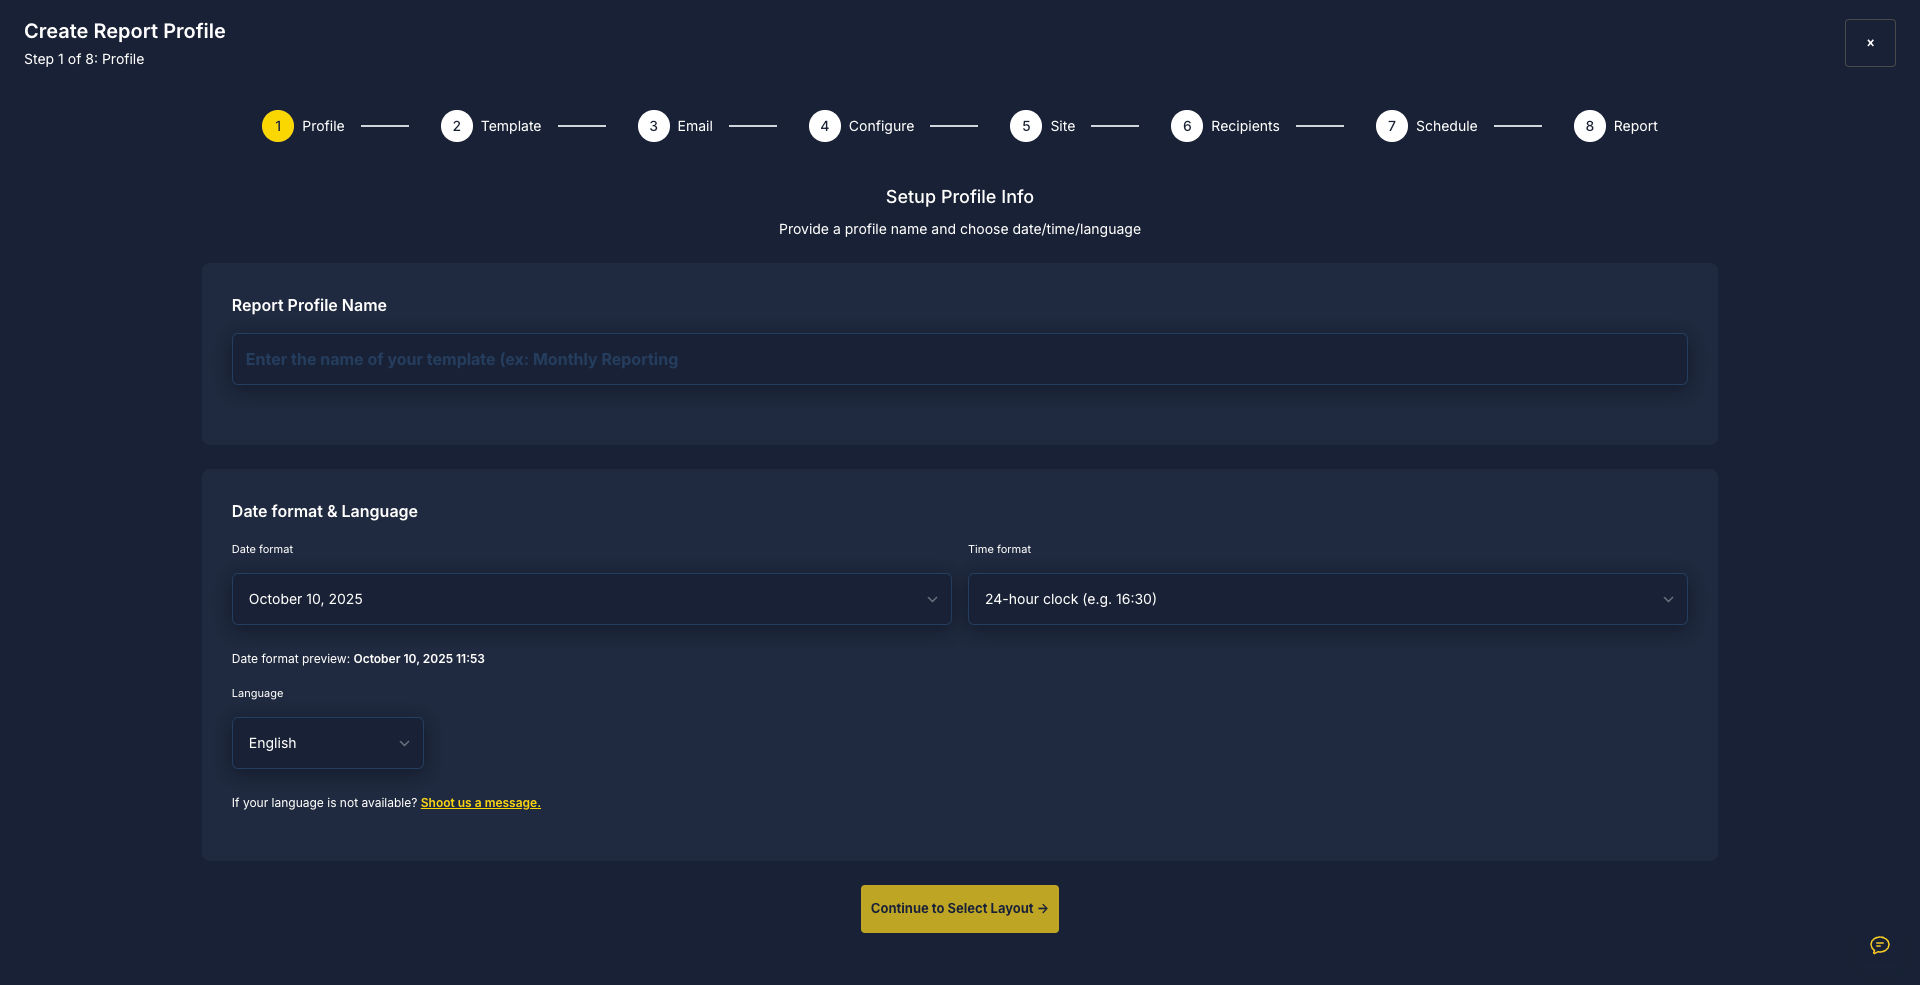
Step 1: Profile Settings
First, configure the basic report profile information.
You will set:
Report Profile Name
Example: Monthly Maintenance ReportDate Format
Choose how dates appear inside the report.Time Format
Select between 12-hour or 24-hour time display.Language
Choose the language used in the generated report.
This ensures the report formatting matches your client’s expectations.
Step 2: Email Content
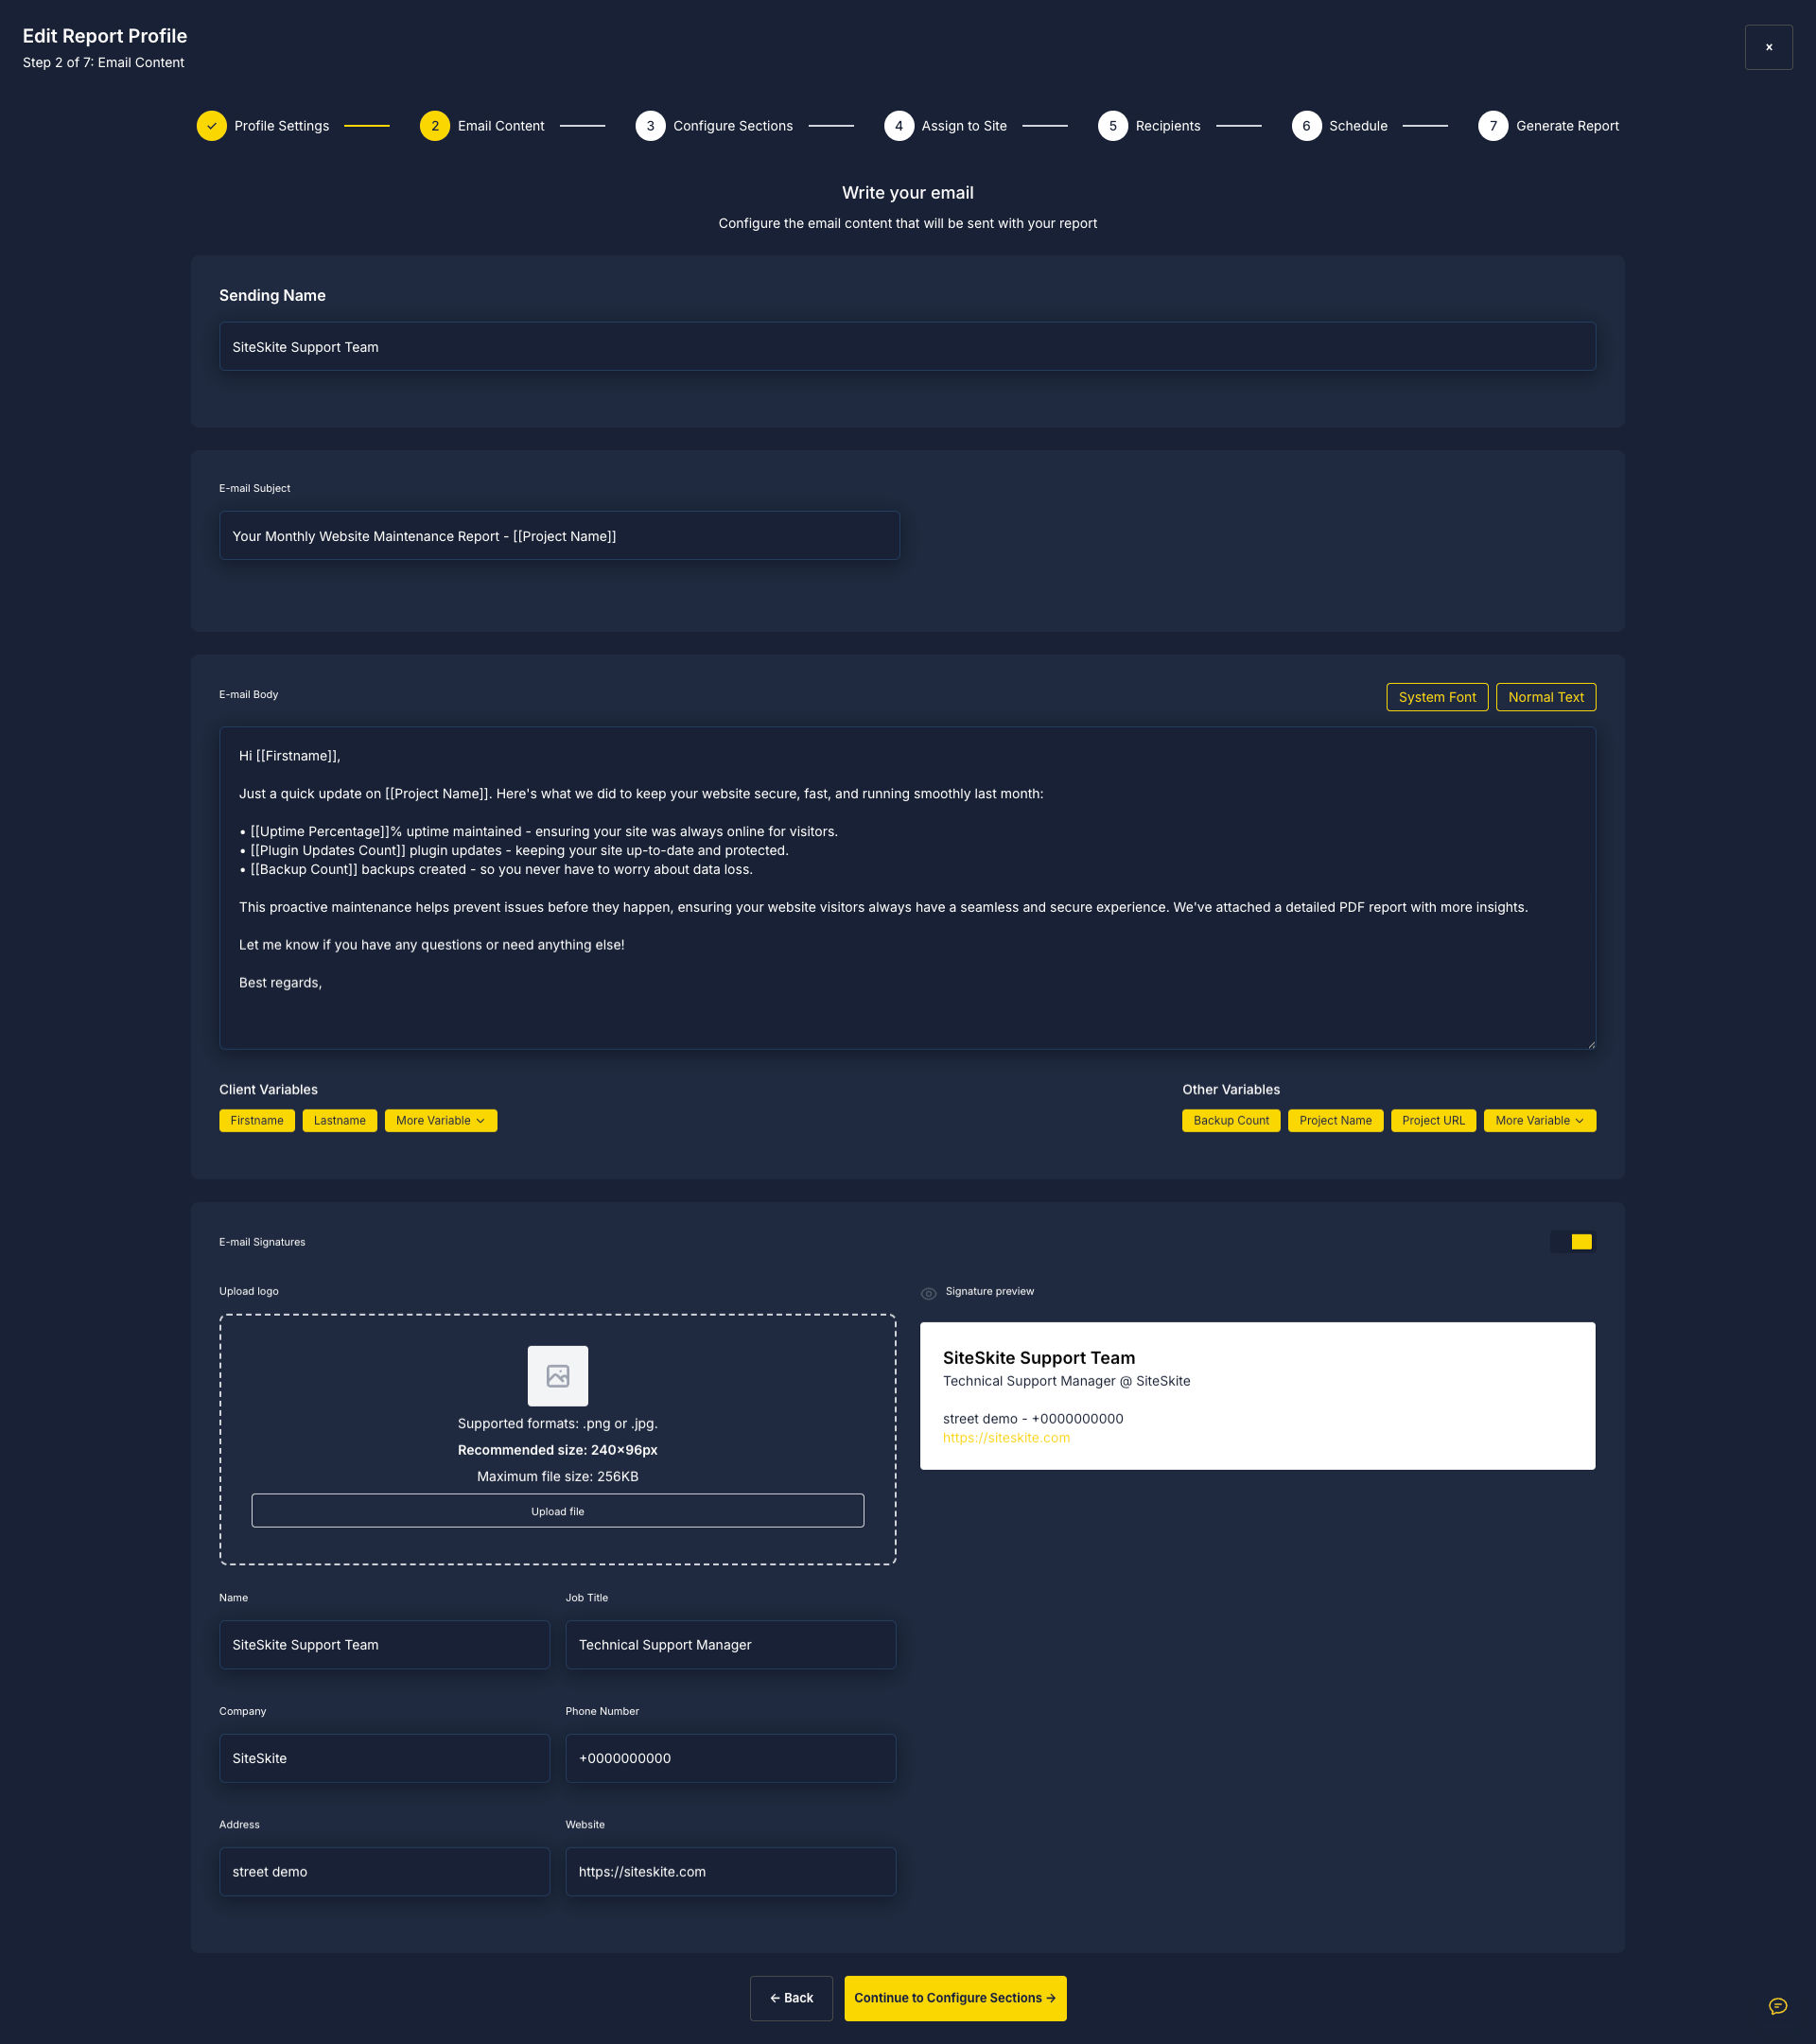
Next, configure the email message that will accompany the report.
You can customize:
Sending Name
Example:
SiteSkite Support TeamEmail Subject
Example:
Your Monthly Website Maintenance Report – [Project Name]Email Body
You can write a custom message that explains the report to the recipient.
Example content may include:
Uptime statistics
Number of updates performed
Backup summary
Security updates
Dynamic Variables
SiteSkite supports variables that automatically insert real data into emails.
Examples:
[Firstname]
[Lastname]
[Project Name]
[Backup Count]
[Project URL]
These variables allow you to personalize each report automatically.
Email Signature
You can also include a branded signature with:
Company logo
Name
Job title
Company name
Phone number
Website
Address
This helps maintain a professional presentation when sending reports to clients.
Step 3: Configure Report Sections
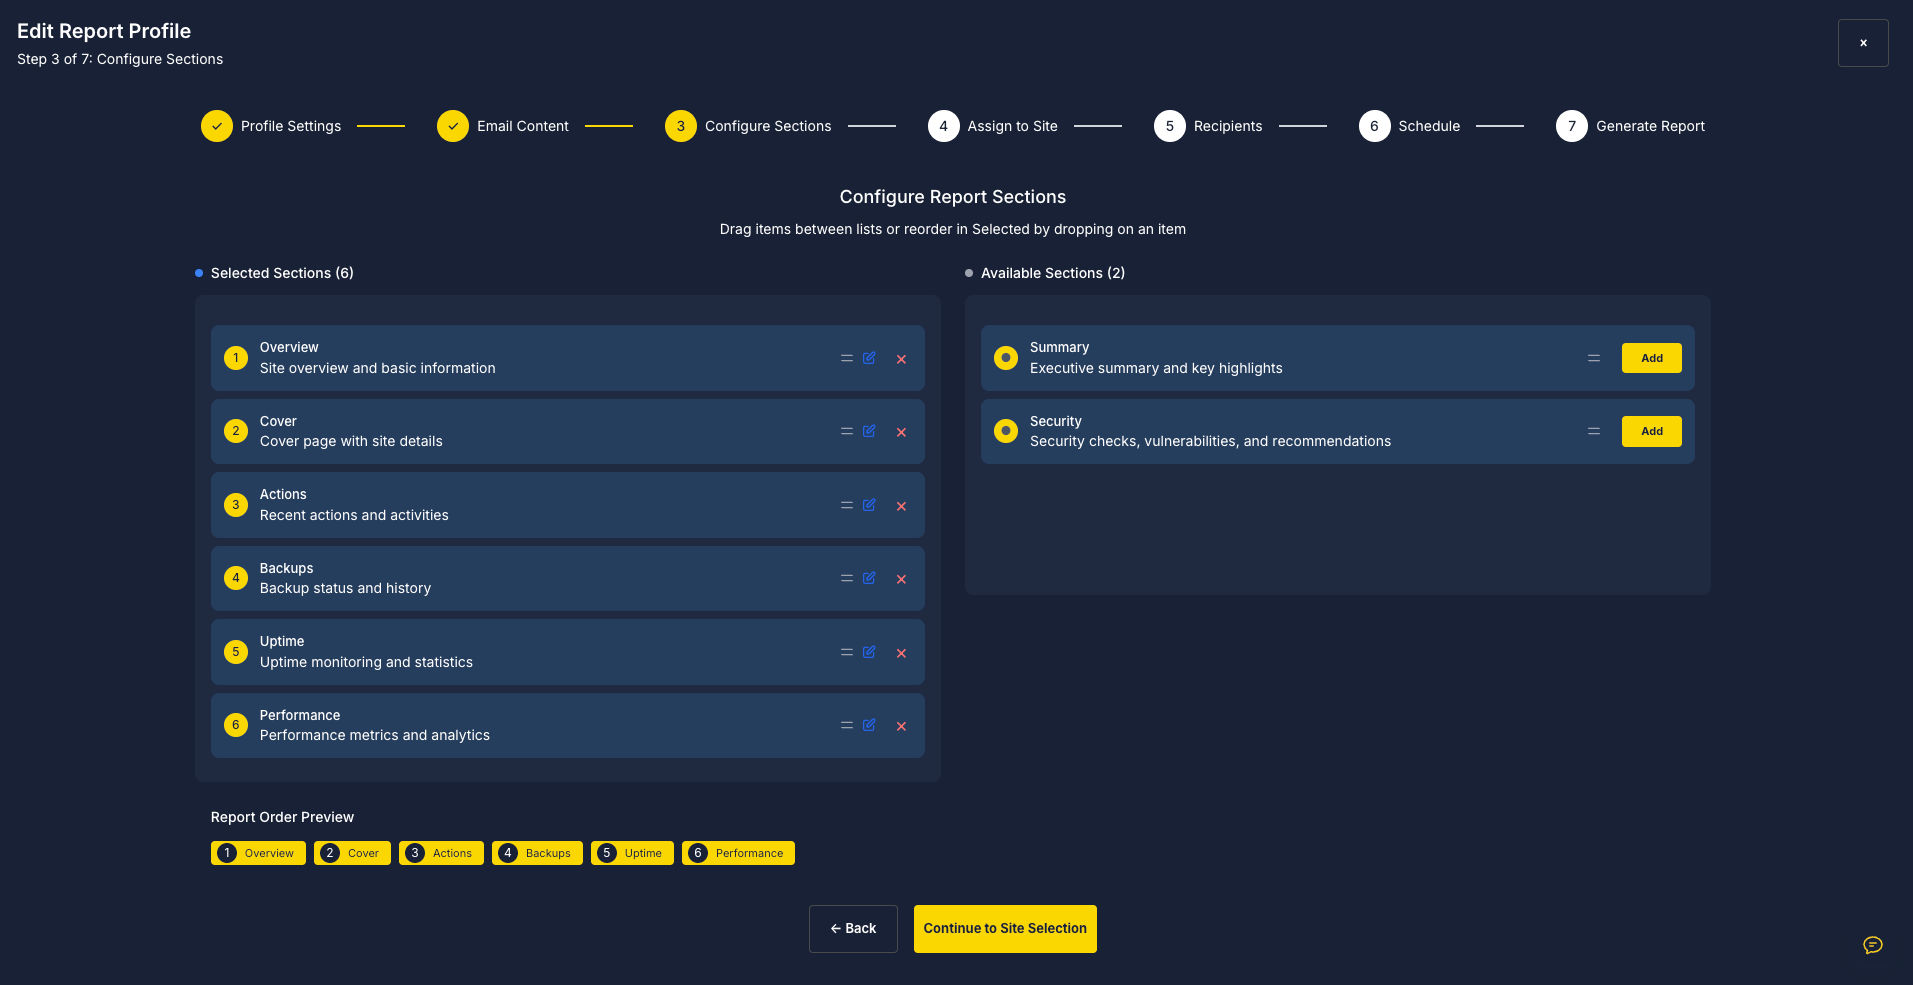
In this step, you define what information will appear inside the report.
You can drag and reorder report sections.
Available sections include:
Overview
Basic site information and summary.
Cover
A cover page displaying the website details.
Actions
Recent activities such as plugin updates or maintenance actions.
Backups
Backup history and status.
Uptime
Website uptime statistics and monitoring data.
Performance
Performance insights and Core Web Vitals metrics.
Optional Sections
Additional sections can include:
Executive summary
Security information
Vulnerability alerts
You can customize the report layout depending on your client needs.
Step 4: Assign Report to Sites
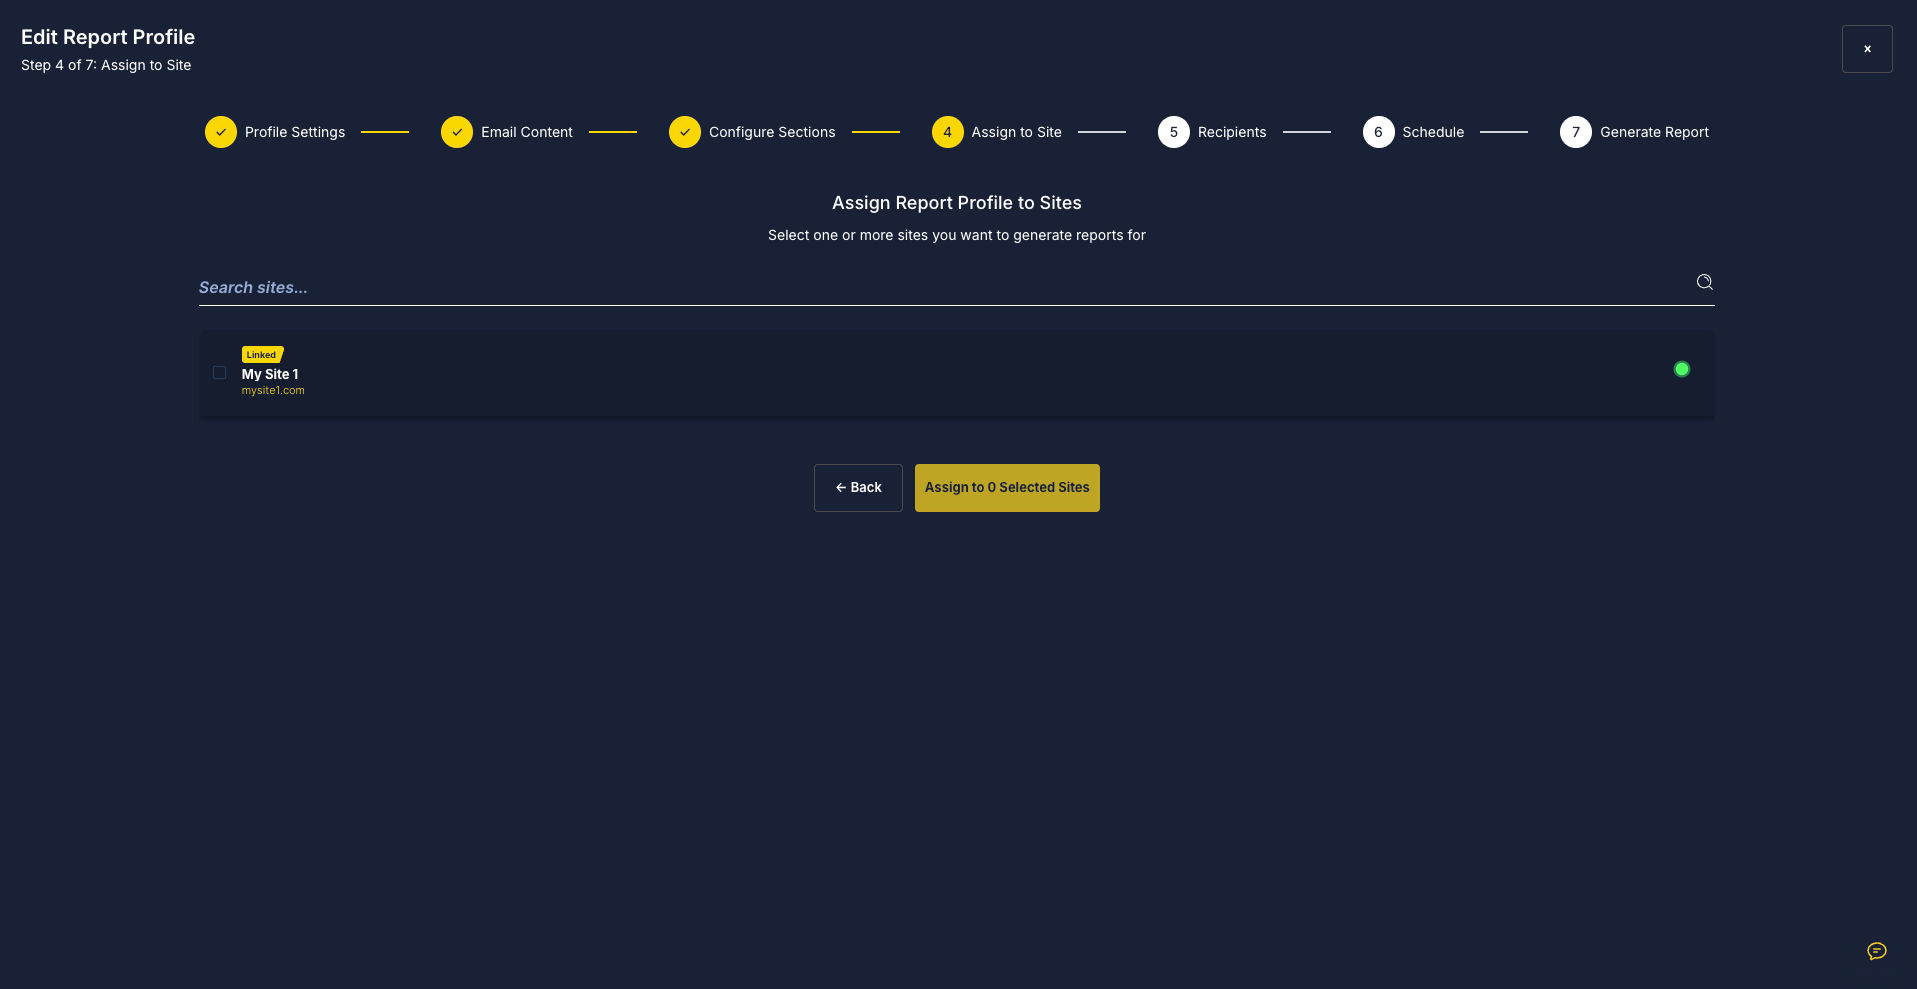
Next, select which linked websites should receive this report.
You can assign the report profile to:
One site
Multiple sites
All linked sites
This allows agencies to manage reporting for multiple clients using a single configuration.
Step 5: Define Recipients
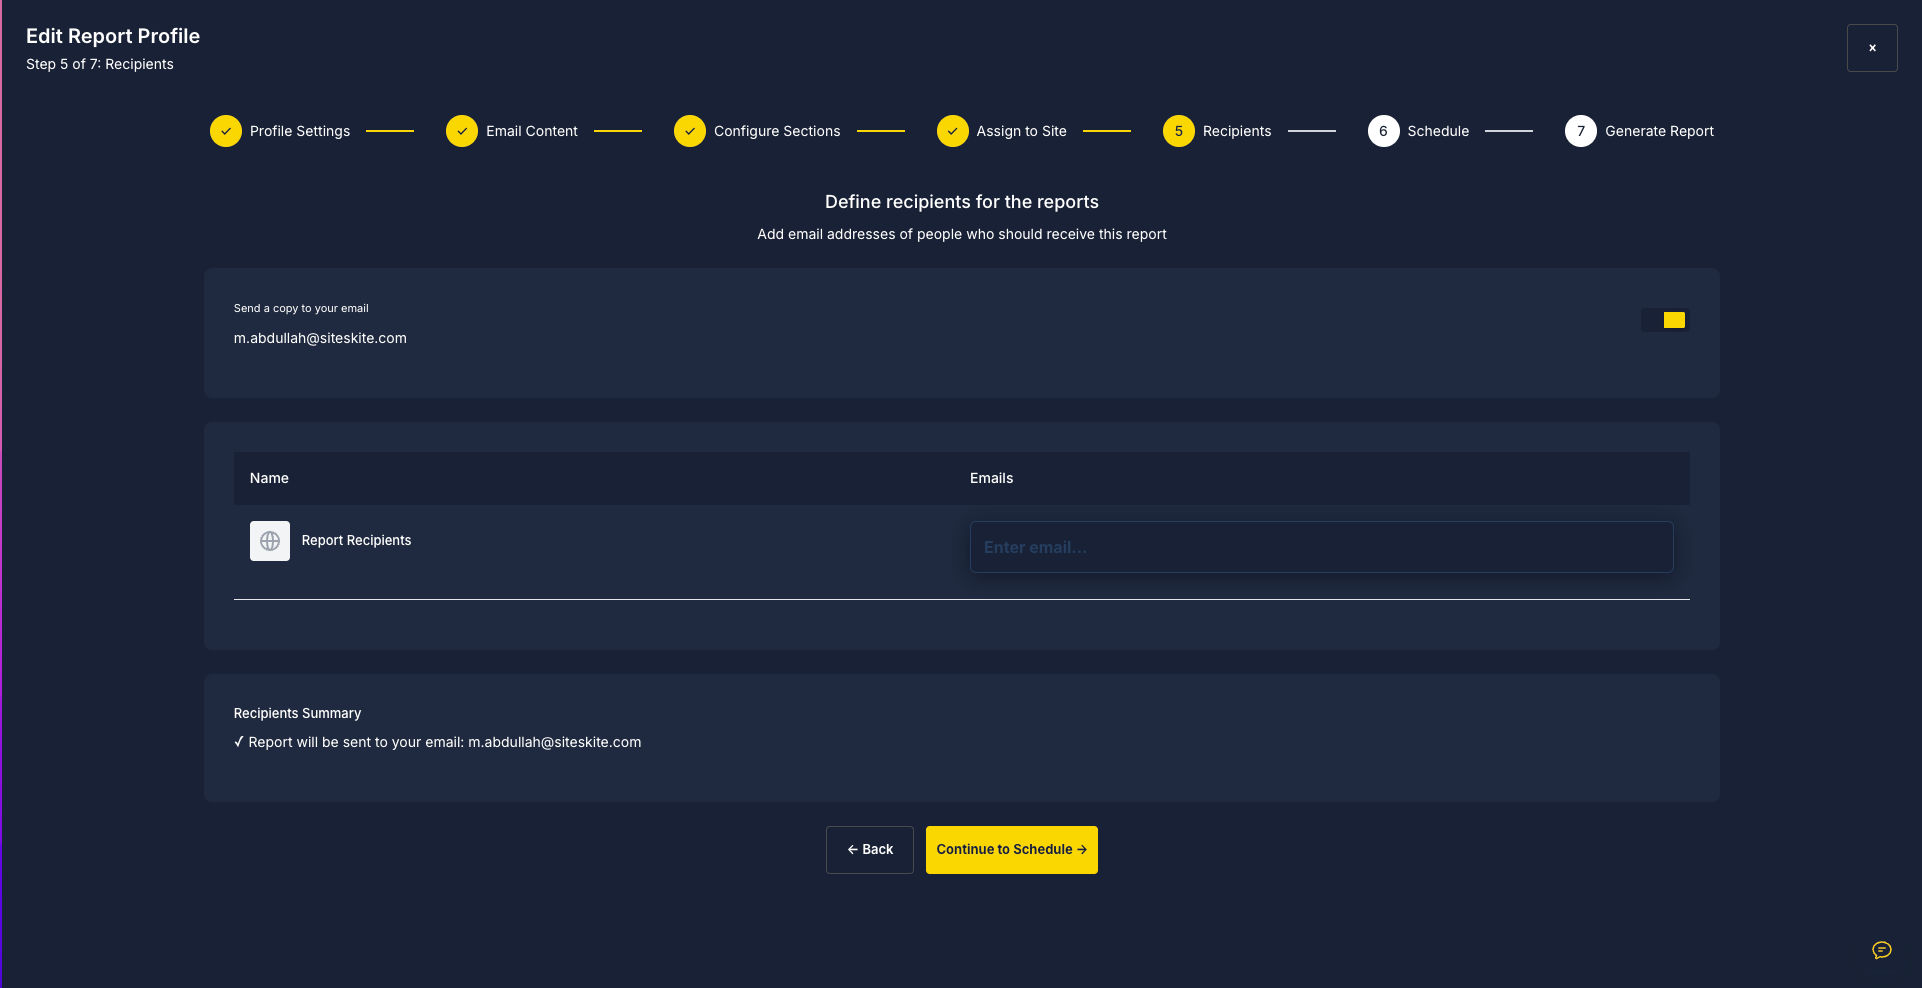
Choose who will receive the report.
You can:
Send a copy to yourself
Add client email addresses
Add multiple recipients
This ensures that both your team and your clients stay informed.
Step 6: Schedule Reports
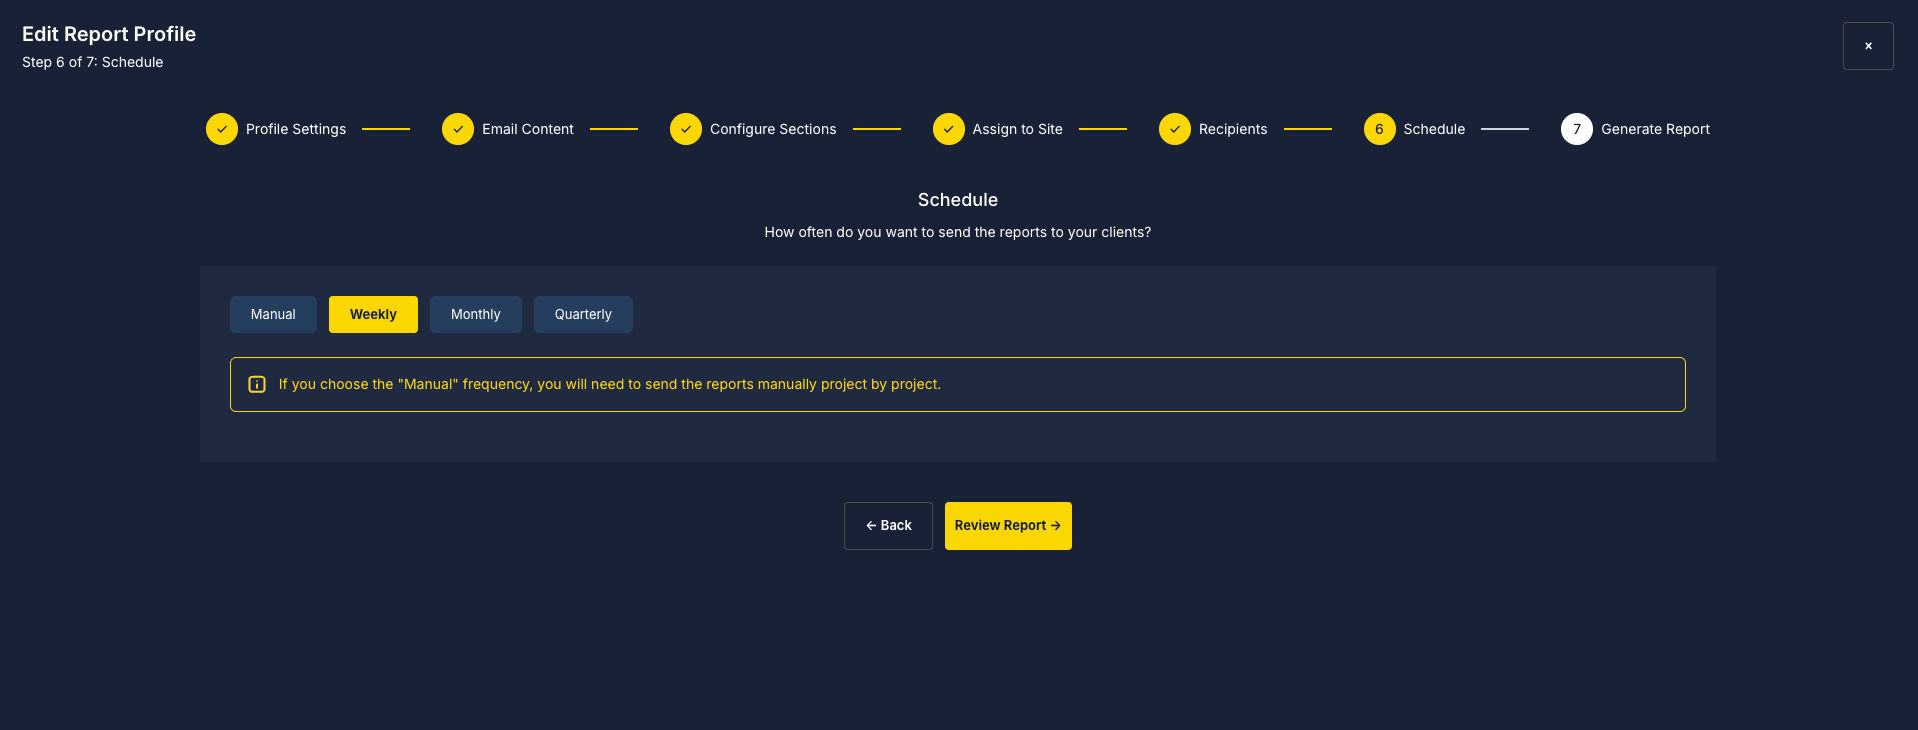
SiteSkite allows flexible scheduling.
Available options include:
Manual – generate reports manually
Weekly
Monthly
Quarterly
Automated schedules help agencies maintain consistent communication with clients without manual work.
Step 7: Generate the Report
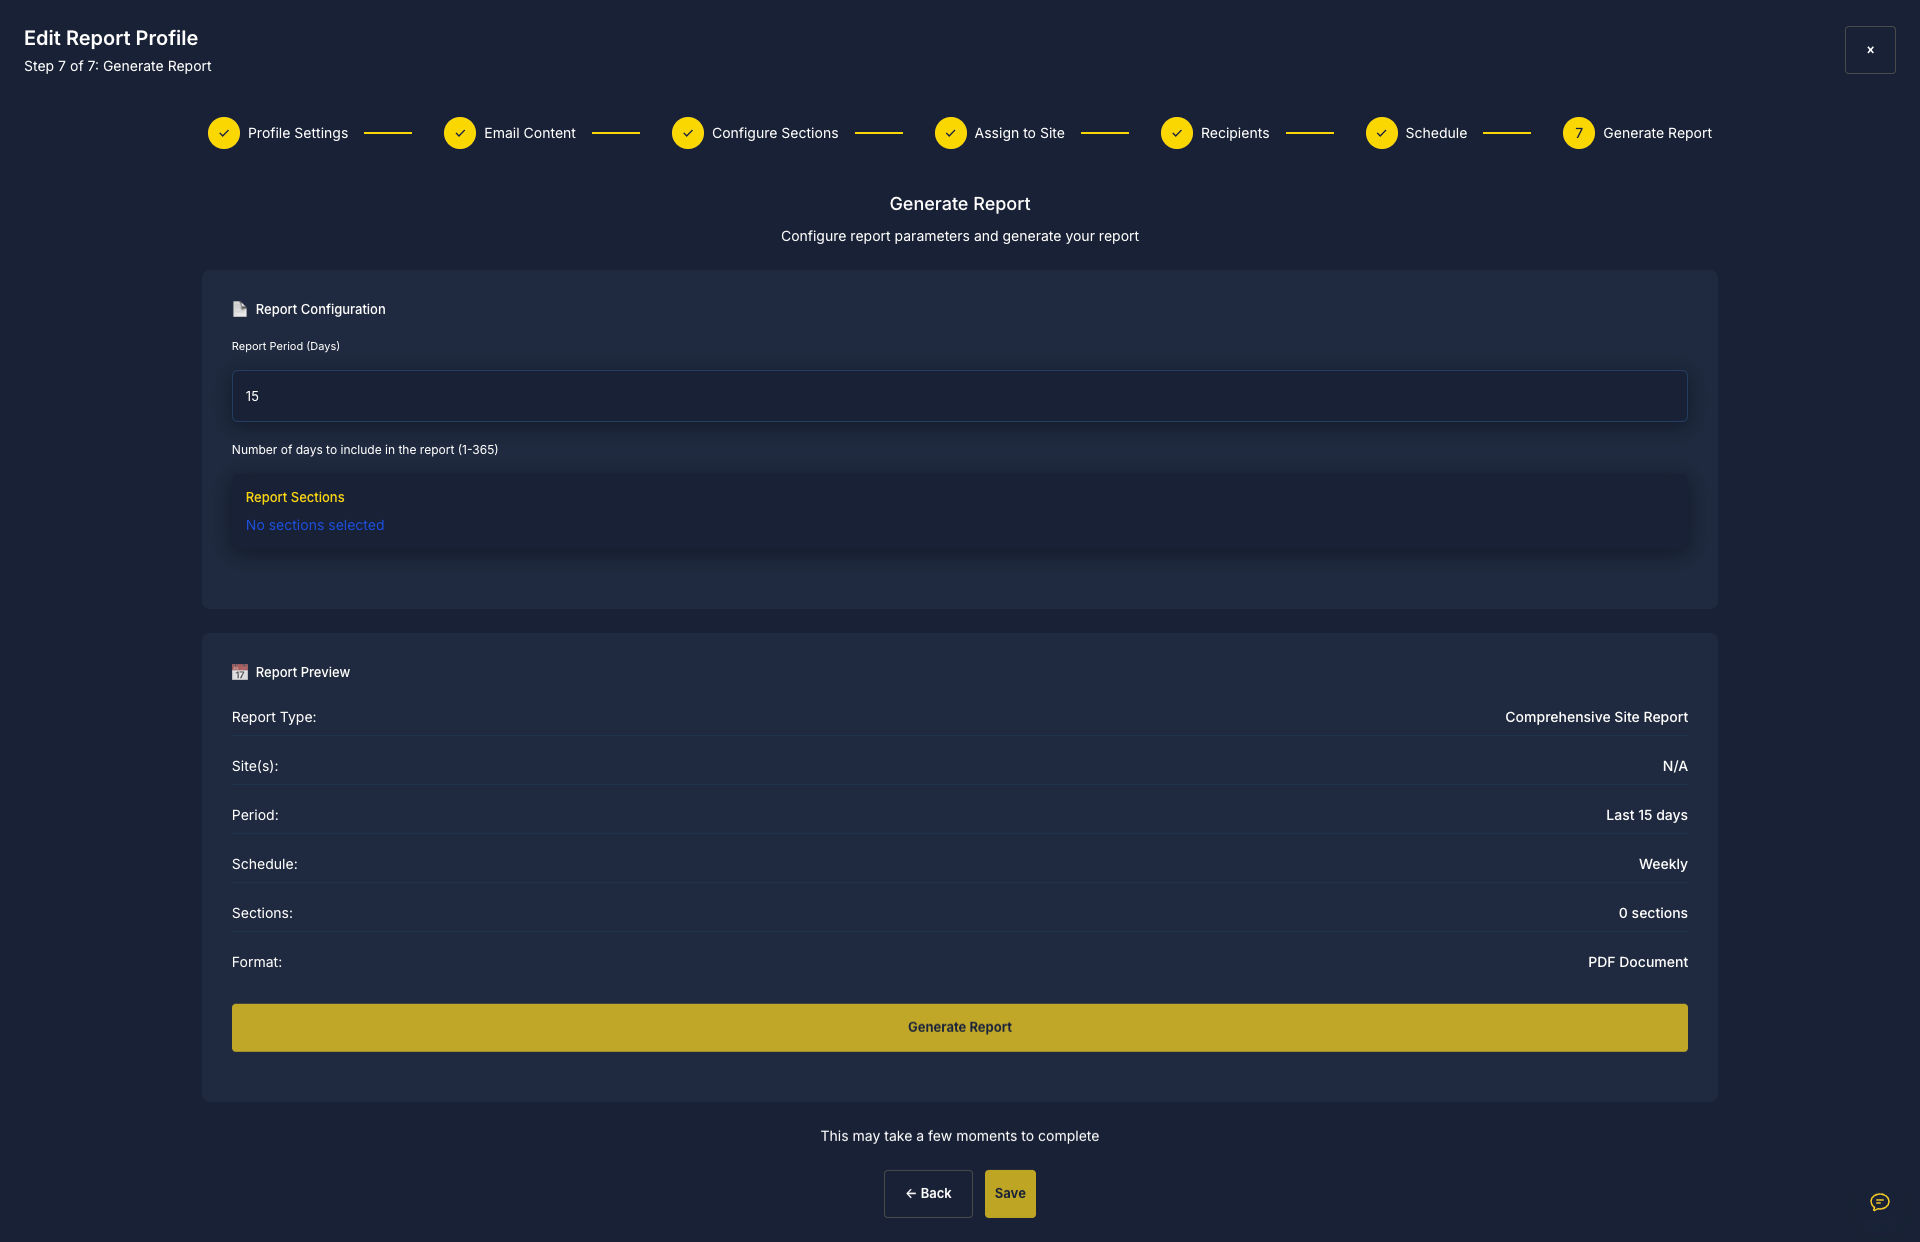
Finally, configure the report generation settings.
You will define:
Report period (days)
Example: Last 15 daysReport sections included
Report format
Currently exported as PDF
After reviewing the report summary, click:
Generate Report
SiteSkite will compile the report and send it to the selected recipients.
What Information Reports Include
Depending on the selected sections, reports may contain:
Website overview
Plugin and theme updates
Backup status
Security information
Uptime monitoring
Performance insights
Maintenance activities
Recent actions taken on the site
This provides full transparency about ongoing website maintenance.
Benefits of SiteSkite Reports
Using automated reports offers several advantages:
Demonstrate Value to Clients
Show the work performed on their websites.
Professional Client Communication
Provide clean, structured reports instead of manual updates.
Save Time
Automate repetitive reporting tasks.
Centralized Management
Manage reports for multiple websites from one dashboard.
Better Accountability
Maintain a record of maintenance activities.
Best Practices
To get the most value from reporting:
Schedule weekly or monthly reports for clients.
Include uptime, updates, and backups in every report.
Personalize email messages using variables.
Keep the report structure consistent across projects.
Summary
The SiteSkite Reports feature provides a powerful way to automate website maintenance reporting. By configuring report profiles, selecting sections, assigning sites, and scheduling delivery, agencies and developers can easily generate professional reports that keep clients informed and demonstrate the value of ongoing website management.