SiteSkite lets you use Dropbox as a backup storage provider so your WordPress backups are safe and accessible anytime. Follow the steps below to connect your Dropbox account.
1. Create a Dropbox App
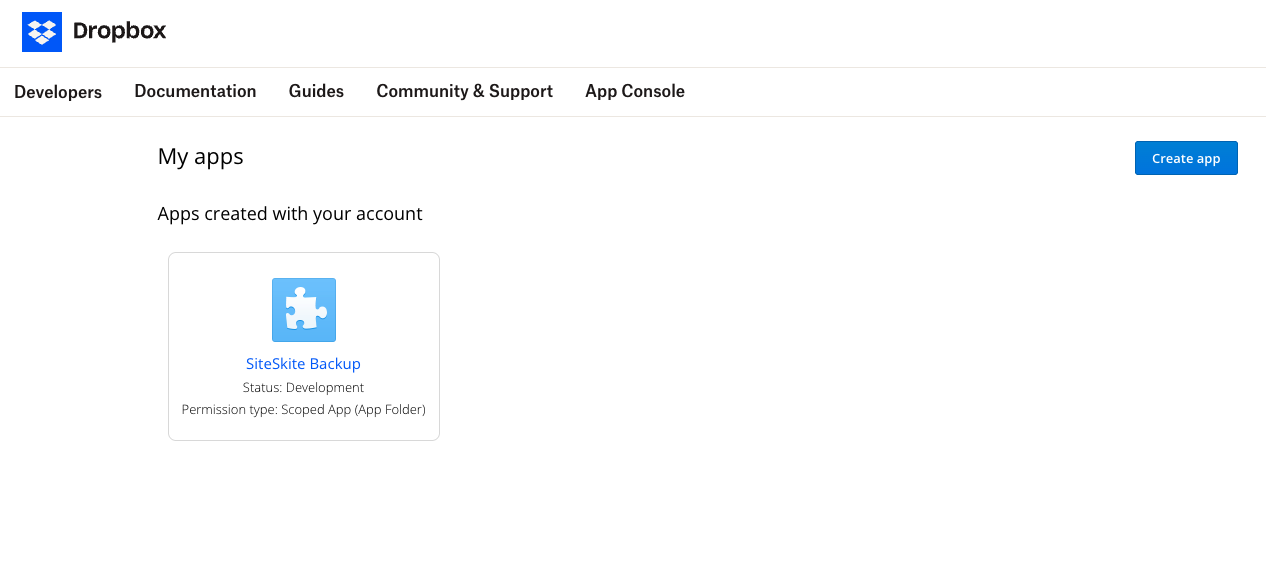
Go to the Dropbox App Console.
-
Click Create App.
-
Select:
Scoped Access → App Folder (recommended for security).
Permission Type → Full Dropbox or App Folder (choose depending on your preference).
-
Give your app a unique name (e.g.,
siteskite-backup).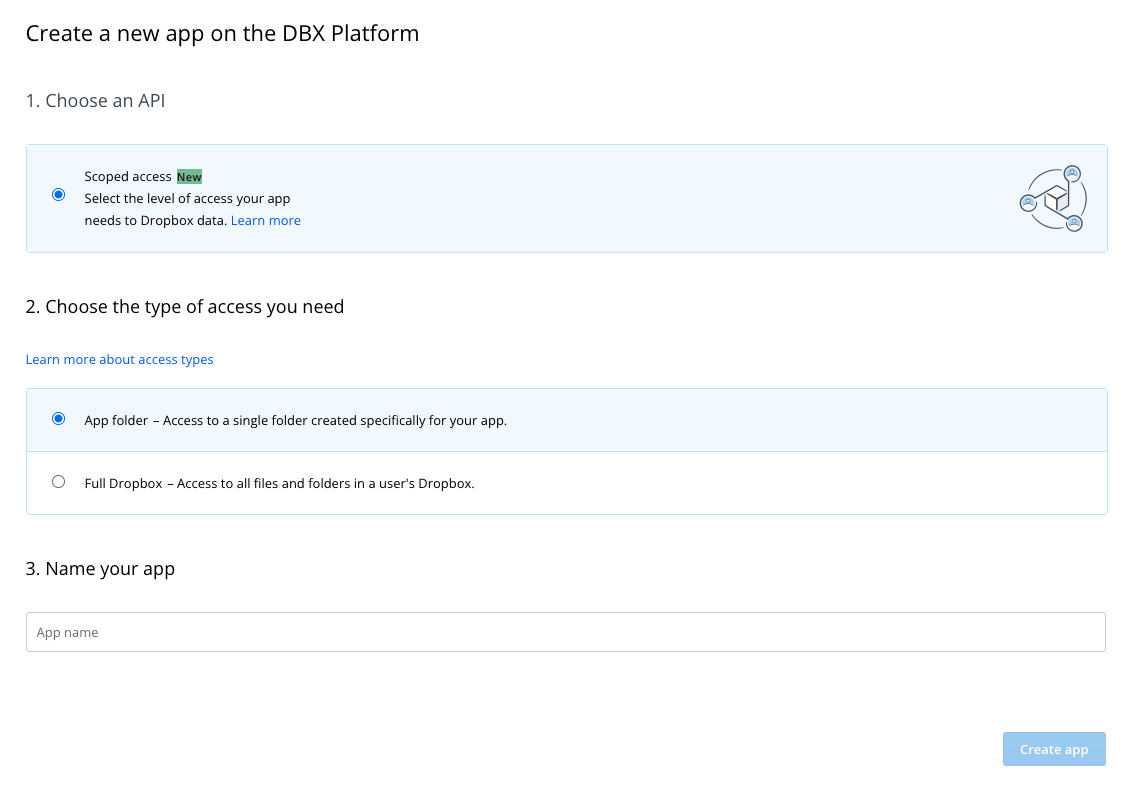
-
After creating, you’ll get:
App Key (client_id)
App Secret (client_secret)
2. Set the Redirect URI
In your Dropbox app settings, add your redirect URI. Example:
https://yourdomain.com/?page=siteskite-callbackThis is where Dropbox will send the authorization code after user approval.
3. Authorize Dropbox Access
Construct the authorization URL:
https://www.dropbox.com/oauth2/authorize
?client_id=YOUR_APP_KEY
&response_type=code
&redirect_uri=YOUR_REDIRECT_URI
Replace
YOUR_APP_KEYandYOUR_REDIRECT_URI.Open this URL in your browser.
Login to Dropbox and approve access.
You’ll be redirected back with an AUTHORIZATION_CODE in the URL.
4. Exchange the Authorization Code for Access Token
Send a POST request to Dropbox API:
Endpoint:
https://api.dropboxapi.com/oauth2/tokenParameters:
code=AUTHORIZATION_CODEgrant_type=authorization_codeclient_id=YOUR_APP_KEYclient_secret=YOUR_APP_SECRETredirect_uri=YOUR_REDIRECT_URI
Dropbox will return an access_token.
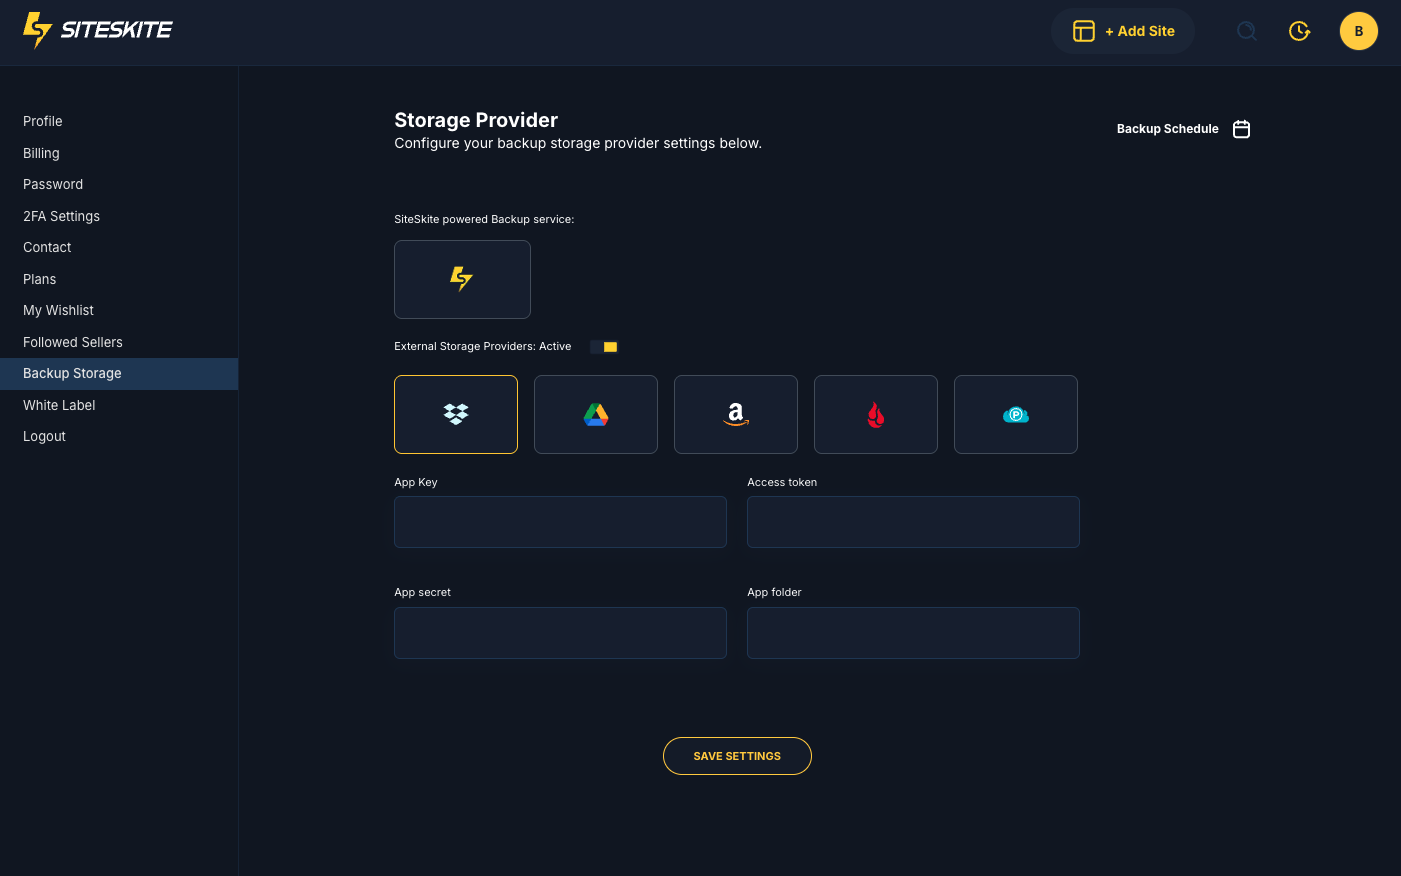
5. Add Dropbox to SiteSkite
Go to SiteSkite Portal → Settings → Storage Providers.
Select Dropbox.
-
Enter your:
App Key
App Secret
Access Token
App Folder
Save the settings.
Once enabled, SiteSkite will be able to:
Upload backups to Dropbox automatically.
Restore backups from Dropbox to your WordPress site.
That’s it! Your Dropbox integration is ready in SiteSkite.